

『Flow Meter Calibration Setup Tutorial: Connecting Reference Meters for On-Site Testing』Related information(v cone flow meter|rotary gas meter|gallon meter|gear meter|metal tube rotameter|glass tube rotameter|nutating disk meter|transit time ultrasonic flow meter|wedge flow meter|pd meters|hydraulic flow meter|ultrasonic water flow meter|water flow meter|air flow meter|magnetic water flow meter|oxygen flow meter|gas flow meter|argon flow meter|air velocity meter|gasoline flow meter|fuel flow meter|ultrasonic water meter|digital water meter|nitrogen flow meter|solid flow meter|Oxygen tank flow meter|digital water flow meter|diesel fuel flow meter|steam flow meter|02 flow meter|compressed air flow meter|oil flow meter|liquid flow meter)
Flow Meter Calibration Setup Tutorial: Connecting Reference Meters for On-Site Testing
Quick Answer: You can calibrate most industrial flow meters on site by placing a reference meter in series with the unit under test. Run the flow stable for 15 to 30 minutes and compare pulse, 4-20 mA HART, or digital signals from both meters. For DN15 to DN80 liquid lines, a portable Coriolis master meter from Silver Automation Instruments is usually the best reference.
On-site calibration avoids two or three days of downtime in a process plant. Lab calibration is accurate but not always practical for water, wastewater, oil, gas, chemical, and food plants that run 24 hours per day.
Here is the thing. You do not need a full flow rig for every line size. A portable Coriolis reference meter works well for DN15 to DN80 liquid lines. For DN100 to DN300 pipes, a clamp-on ultrasonic reference meter often saves time because you do not need to cut the pipe.
Step 1: Record the process parameters before connecting anything
Write down the normal pressure in bar, temperature in °C, pipe size DN, and flow range in kg/h or m3/h. Ask the operator about fluid viscosity. For chemicals, food oils, and heavy fuels, viscosity shifts the Reynolds number and changes the meter output.
Most engineers skip this part. Check the straight pipe run before the test section. An electromagnetic flow meter needs 5D upstream and 2D downstream. A vortex flow meter may need 15D upstream and 5D downstream. Pipe vibration, loose supports, and air bubbles ruin calibration data on Coriolis and ultrasonic meters.
Step 2: Connect the reference meter in series
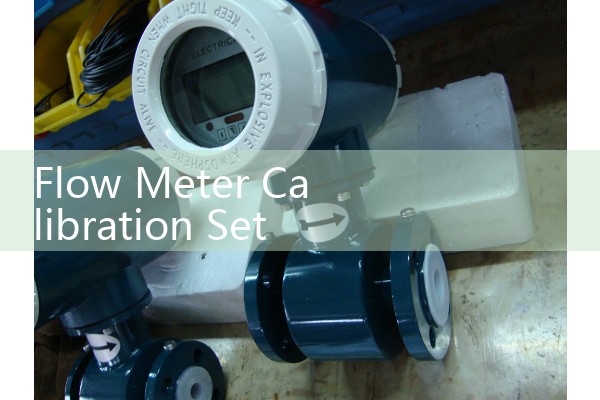
Install the reference meter in the same pipe run as the flow meter under test. Keep the flow direction arrow on both meters pointing the same way. Use flexible hoses or spool pieces when the meter bodies have different lengths. A DN25 Coriolis reference meter can fit a DN40 process line with reducers. Use eccentric reducers for dirty water or slurry to avoid air pockets.
Wire the outputs side by side. Compare the 4-20 mA HART signals if both meters have analog output. Use pulse outputs if you need totalizer verification. For a DN150 electromagnetic flow meter with a 0 to 500 m3/h range, a reference meter with a 0 to 600 m3/h range is a better match because the normal flow should sit near 50 to 80 percent of scale.
Set the damping time the same on both devices. If one transmitter is set to 1 second and the other is set to 5 seconds, the live values will never line up. That mistake is common on customer sites.
Step 3: Run the test and collect data
Let the flow run for at least 15 minutes before you record data. Then record one data point every 30 seconds for another 15 to 20 minutes. Do not accept a calibration from five data points. A 20 minute test should produce 40 data points. The average error matters more than one single snapshot.
Compare the average flow error. If the meter shows a 2.5 percent deviation against a Coriolis master meter, check the low flow cut off and the K-factor before you adjust the sensor. Many electromagnetic flow meter errors are settings problems, not sensor drift.
 3>Step 4: Check the reference meter accuracy class
For custody transfer or billing applications in oil and gas, use a master meter with 0.1 percent accuracy or better. A standard 0.5 percent electromagnetic flow meter is not good enough as a reference. Silver Automation Instruments supplies Coriolis mass flow meters with 0.1 to 0.2 percent accuracy for liquid calibration loops.
Case examples from customer sites
A water treatment plant in Vietnam needed to check a DN150 electromagnetic flow meter on a wastewater line. The plant did not want to remove the meter. We suggested an ultrasonic clamp-on reference meter installed on the same pipe section. The flow profile was stable after a 10D straight run. The comparison showed a 1.1 percent deviation. The plant adjusted the meter factor and brought the error to 0.3 percent.
A paint manufacturer in Southeast Asia calibrated a DN25 oval gear flow meter with a Coriolis master meter. The paint viscosity was 1200 cP at 35 °C. The oval gear meter read 2.8 percent low at 300 kg/h. The Coriolis meter measured mass flow directly and ignored the viscosity correction issue. The plant kept the Coriolis meter as a temporary reference for other filling lines.
What to send us for a reference meter quote
Tell us the pipe size DN, fluid, flow range, pressure in bar, and temperature in °C. We can recommend a Coriolis master meter, an ultrasonic clamp-on reference meter, or an electromagnetic reference meter for your line size and accuracy class.
Contact Silver Automation Instruments
Tel: +86-25-68650347
WhatsApp: +86-25-52155837
WeChat: +86 15365082610
Website: flow-meter.com.au
FAQ
What is the best reference flow meter for on-site calibration?
For liquid lines from DN15 to DN80, a Coriolis mass flow meter works best. It measures mass flow directly and is not sensitive to viscosity changes. For larger pipes, use an ultrasonic clamp-on reference meter.
Can I calibrate a flow meter without removing it from the pipe?
Yes. Install a portable reference meter in series during a planned shutdown or use a clamp-on ultrasonic meter on the outside of the pipe. The clamp-on method works well when the pipe is full and the flow profile is stable.
How long should an on-site calibration test run?
Run the test for at least 15 to 20 minutes at stable flow. For billing or custody transfer meters, run 30 minutes. Record data every 30 seconds and compare the average reading.
What accuracy should a reference meter have?
The reference meter should be at least 3 times more accurate than the meter under test. For a 0.5 percent electromagnetic flow meter, use a 0.1 or 0.2 percent reference meter. For a 1.0 percent meter, a 0.3 percent reference meter may be acceptable.
Why does my flow meter reading not match the reference meter?
Check the flow profile first. Straight pipe, air bubbles, loose supports, and vibration cause most mismatches. Then check the K-factor, low flow cut off, damping time, and analog output scaling. Many field errors are transmitter settings, not sensor drift.
 Hot Blog
 Related AD